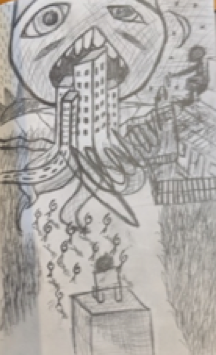
 When I describe my creative process, it seems easiest to compare it to things you’d see in nature. Most often, my creativity comes in waves. I’ll work on a project over the course of a few weeks: I’ll work on it for a few days, then take a few days off to work on something else. Unfortunately, though, it’s not always such a serene practice. Sometimes, I feel like I'm swirling in a tornado of ideas, not really able to latch onto anything in particular and getting wrapped up in feelings of frustration. Other times, it’s like a crack of lightning, where I get hit with some serious inspiration and focus for one specific thing, and I can finish whole poems or paintings all in one go. More recently, though, I’ve experienced a burst of creativity which can be only compared to a wildfire.
At first, it was awesome! I was working on multiple paintings, poems, videos, and articles all at once. Like many people adjusting to a work from home lifestyle, I felt able to cram more and more of my free time with ways to be creative, ways to channel my anxiety, and ways to produce things that would help others cope with the world as we move through the world. There was a feeling of accomplishment as I was able to finish projects and stay passionate about my work as I jumped onto another. I also felt encouraged by the other artists around the globe taking advantage of the extra time and energy they had to focus on building their portfolios. The thing about wildfires is that they can’t regulate themselves very well. As they continue to burn, eventually they will eat through all of their available kindling. Once that happens, they will be unable to go any further. They burn themselves out. Recently, I started feeling myself struggle to do anything creative, even though I still had the drive to make new things as I had been doing for the last couple months. At first I didn’t understand why it was it was hard for me to create anything when a week or two prior, I felt like I was on a creative streak. Looking back, however, it started making sense: I had just finished writing a series of new poems, finished two paintings, had multiple offers for projects outside of work, and on top of that, I was still working full time (even if my office is just a few yards away from where I sleep). And, like I always point out when talking about stress in 2020, the world around us isn’t exactly a comfortable, stress-free place to be at the moment. At the same time I was starting to feel the beginnings of my own burnout, I noticed articles from all over the web describing how so many creatives are going through the exact same thing. Just as a wildfire tends to eat up everything in sight, I was allowing my plate to get immensely full without thinking if I had room for everything to fit. There is only so long you can work at full capacity like that. The good thing about metaphors, in this case, is also the recognition that they can only explain so much of what they are being compared to. Unlike wildfires, we have the ability to recognize when we are approaching a creative burnout. And luckily, we can also find ways to slow down, take stock of how we’re feeling, and create strategies to help us navigate through, and hopefully avoid, total burnout. A little while ago, my colleague Mike Campbell and I created a workshop titled “5 Fun Ways to Beat Quarantine Creative Block,” which had some fun activities designed to take your mind off your block and try to inspire some new ideas. But it doesn’t always take being creative to avoid or heal from creative burnout. Sometimes it takes a good night’s rest, watching your favorite TV show, or going camping (currently working on doing all three). And while I feel comfort by getting back to a place where I can be creative as soon as I can, there isn’t a requirement to get back to being creative within a couple days, weeks, or even months, in some cases. So, if you are starting to feel frayed at the ends, or like the candle you’ve been burning at both ends is running out of wax, take a step back for a moment. Keep your expectations reasonable, take breaks as needed (extended ones if possible), and make sure you are staying connected to what your body needs from you in order to heal and move forward. Creativity will be there when you get back. - Jasmine Green, Center for Creativity Assistant. Find Jasmine's work here or follow her on Instagram.
0 Comments
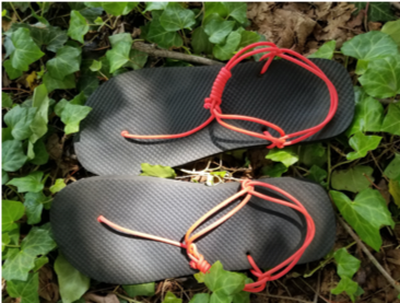 Summer is already upon us! Despite the rain forecast, I went backpacking over Memorial Day weekend for the first time this season. A slight drizzle on Saturday kept the crowds at home, and after weeks of being stuck within four walls, I finally got that rejuvenating dose of quiet open air I had been dreaming about through both the winter and Pennsylvania’s Red Phase. The best part of setting up camp in the backcountry is peeling off the day’s shoes and socks and slipping on a (relatively) clean pair of camp shoes. Styles vary, with Crocs being among the most common camp footwear. I had only a 98-cent pair of Walmart flip-flops, and while good enough for a weekend, they were not ideal for scurrying down a hillside to fetch water or anything beyond carefully shuffling across smooth, flat ground. 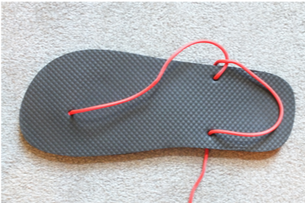 When I got home, I spent an afternoon converting them into huaraches, a type of minimalist sandal originating in Mexico and quite popular, in a stripped-down form, among barefoot runners (a community of which I am, admittedly, not a member). The straps are made of a series of loops in a single length of cord, so that the entire sandal can be re-laced around the foot every time for a snug fit. For casual wear, the cord is tied off and just loose enough to slip one’s heel out. With the flip-flop soles and a few feet of paracord, it was an easy job. Any rope can work, though synthetics are longer-lasting; each of my huaraches used about five feet. 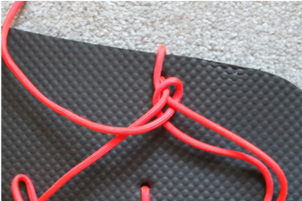 There are a few lacing techniques to choose from (like this one), and it can be puzzling at first, but like tying any shoes, eventually it becomes second-nature. All that’s left is to trim the soles to a custom fit. This can be done with a razor blade or knife and several careful passes. Alternative sole materials can be anything flexible and durable: leather, canvas, recycled inner tube rubber, etc. The thinner cord is much more comfortable than the the thick plastic strap originally on these flip-flops, and with the added security of a heel strap, these shoes are ready for stream crossings and tramping through the woods to hang a bear bag. 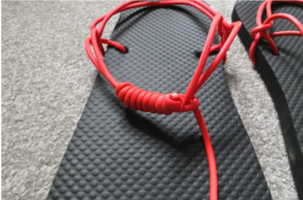 Sometimes the simple projects are the most satisfying: they help me shake off the all-too prevalent creative cobwebs as working from home continues. And if the project encourages me to get out and enjoy the summer, all the better.
If you are going outside, please do so in as safe a way as possible —mask up, continue social distancing, wash your hands — and always follow Leave No Trace guidelines. Happy making! - Chad Brown, Center for Creativity Assistant. Find Chad's work on Instagram. The experiments with making my own materials continue! This week, I made sokui, a glue historically used in Japan and made with only white rice and water. When blended into a smooth paste, the starch in the rice creates a strong bond that is both acid-free — so it won’t degrade the materials being glued over time — and water-soluble. Sokui is commonly used with paper crafts, shoji screens, and in bookbinding; I also found a blacksmith who uses it in making hilts and scabbards for swords. Its solubility makes it super easy to clean up and kitchen-friendly. In my research, I found that sushi rice is recommended, but in my experiment, I used plain off-the-shelf white rice. Brown rice contains the husks of the grain, which won’t break down in the mashing process; even with white rice, I found there were a few husks, but for my purposes, this wasn’t a deal-breaker. With only one sample, I was not able to tell whether or not the additives in the “enriched” rice — such as niacin — had an effect on the final product. The process is very simple: start by cooking a small amount of rice as per the package instructions. I found just 1/8 of a cup of dry rice to be enough to start with. Do not rinse the rice beforehand; in contrast to rice meant to be eaten, you want all those gummy starches in the glue. Once the rice is cooled enough to handle, the mashing process begins. This takes a fair amount of time to fully break down each grain. Some folks will crush the rice in a food processor before cooking, which could speed things up a considerable amount. Overcooking the rice a bit will also help the grains break down. I used an old gift card and the back of a spoon to mash the rice into a paste, working small amounts little by little into a smooth, translucent, and fairly dry paste. Friction is your friend here, so don’t add any water until the final stages when you’re ready to use the glue. The final paste can be pigmented easily; the paste itself dries clear. I added a small amount of homemade India ink. I thought this would be a good chance to try monoprinting. I used a paper towel and the gift card to smooth out the blackened sokui and smudge a design into it. Getting the right consistency takes some experimentation, but is as easy as adding a few drops of water or mixing in more glue. This stuff did not roll out very well with a brayer; it could have been too sticky and thick, which you can see where the paper was pulled away from the ink. The paste will keep in the fridge and can be reconstituted with water, but does get quite rubbery, so it’s best to use it the day it’s made. The result was not what I had expected, but that’s the appeal of a monoprint, I guess! I do like the rough and rustic look in the print; it seems to go well with a saguaro cactus.
This is a simple way to experiment with a simple printing technique without the expense of commercially-manufactured ink. By using pigments found in the kitchen, such as various spices or some of the organic inks I’ve been making from cabbage and black tea, I had no reservations mixing this up in my kitchen. I’m also excited by its potential as a glue for wood projects. Because of the ongoing pandemic, it’s very cool to be able to make this versatile material on-demand and save a trip out. Happy making! Further reading:
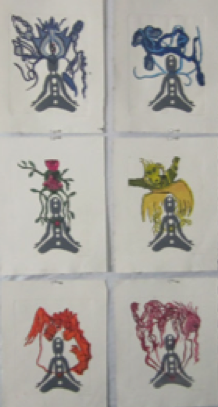
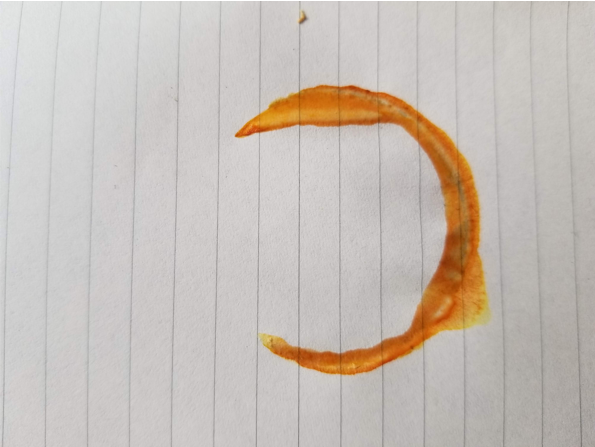
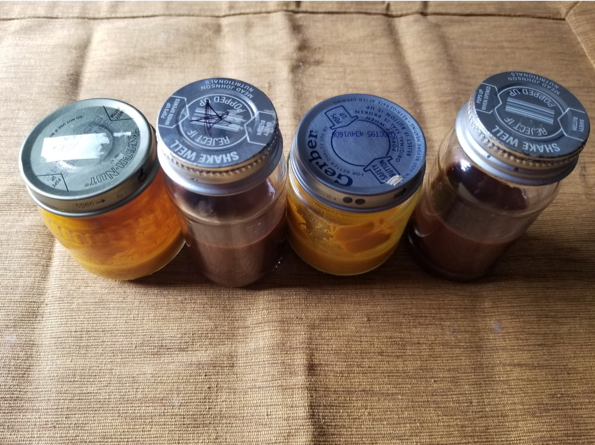
- Chad Brown, Center for Creativity Assistant. Find Chad's work on Instagram. Being at home has given me a lot of time to tinker on all the projects I have going, as well as to think about new skills and processes I’d like to try. Having no prior experience, and thus no supplies at the ready, I have decided to experiment with making my own paint and inks from scratch, following several recipes I’ve found online. This is the result of my first experiment: Natural Ink from Turmeric and Tea. This was the simplest recipe I found, and one that I thought could work with household ingredients: one part plant material to two parts water, simmered for 30 minutes, and strained. Thickening with gum arabic was the optional last step, and since I had none on hand, I tried that classic kitchen staple for thickening: cornstarch. I made two batches: one of turmeric and one of cheap black tea. 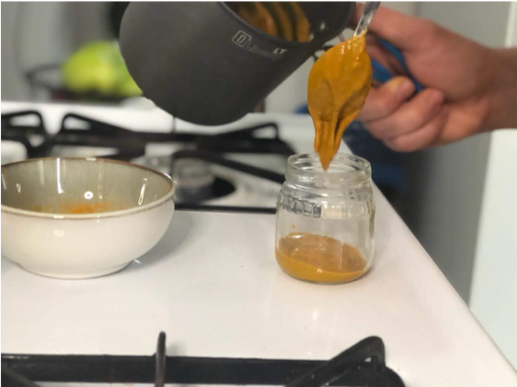 The result was weird. I combined 6 teaspoons of turmeric with 12 of water and set the pot to simmer. Before I even began heating, the mixture was starting to thicken, and within less than two minutes, almost all the water had been absorbed, leaving a mixture like peanut butter. I doubled the water, making a thick, grainy paste, and poured it into two jars to cool. To one, I added a scant one-eighth teaspoon cornstarch. My kitchen smelled amazing. A full 24 hours later, some of the water had separated out of each jar, and there was no discernible difference between the two. The paste leaves a nice vibrant mark on paper that seems durable, but this stuff is definitely not ink. It may work as paint. The second batch was tea. This one worked out better, I think both because I had a larger quantity of material and because this recipe was not meant for spices. As the recipe predicted, one cup of water reduced to 4 ounces of super strong black tea concentrate after simmering and straining. I was able to get 4 ounces only after pressing the thick slurry through my Aeropress, but I think a fine strainer would work as well.
Again, there was no obvious difference between the jar with added cornstarch and the one without; some of the cornstarch seemed to precipitate out as the mixture cooled as well. Unlike the turmeric, this concoction is too thin to be ink; again, the importance of a gum or binder reveals itself. Although I do not have a finished product, there are some valuable takeaways from this experiment as well as the simple joy of DIY chemistry and making a mess to sate curiosity. Sometimes, it only opens the door to further exploration. There will be plenty more messes and experiments to come. - Chad Brown, Center for Creativity Assistant. Find Chad's work on Instagram. I’ve been using my time stuck indoors to experiment with creating my own materials — a result of having excess time to learn new processes, coupled with a lack of foresight and failure to stock up before the closure of non-essential businesses. I’ve made tempera paint with eggs, inks with cabbage and tea, and today my own recycled paper with a jury-rigged mold and deckle. And none of them have come out as expected. 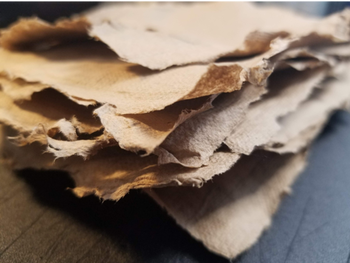 Aside from trying to keep extraneous online shopping to a minimum, I am confronted with the question of what it means to spend hours of frustration to create products far below the quality standards of commercially-manufactured goods. The process is the point! I can pretty much guarantee there isn’t another sheet of paper out there exactly like this one, wrinkled and textured by the dish towels I pressed it in overnight. 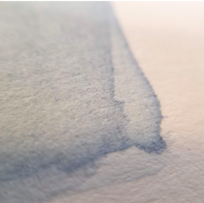 Nor is there an ink that has depth and character in the same way that this one does. Opening up all the variables to the maker allows for their influence to come in at every stage of the process, so even though my ink smells somewhat swampy and the paper is lumpy and inconsistent, each resulting material contains a small piece of my history: where I found the materials, the recipes I followed, the mistakes I made along the way. It feels like it’s truly mine. The scrap paper used to protect my table from spills becomes a record of the adventure. And putting the philosophy aside, there is of course the pure fun of Science! 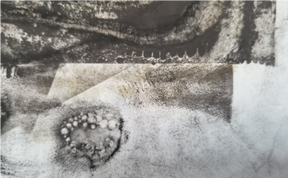 Exploring and understanding how things are made and how they work is itself a creative act. Seeing red cabbage come out of a boiling pot of water a radiant cobalt blue is an uncommon joy greater than anything I experienced in high school chemistry.
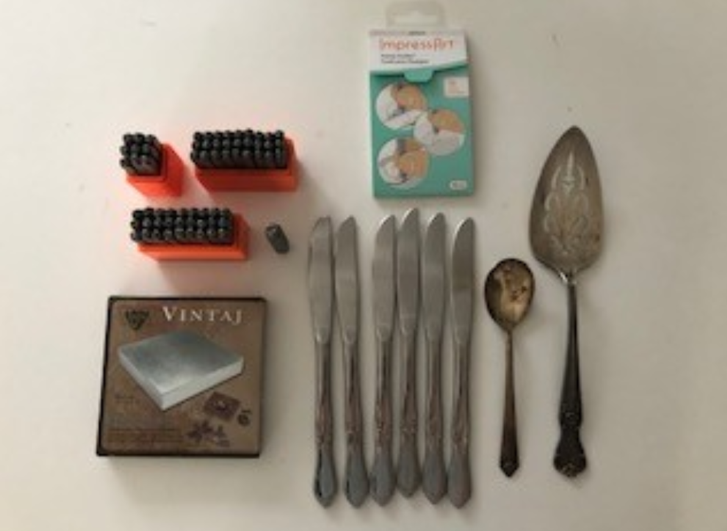
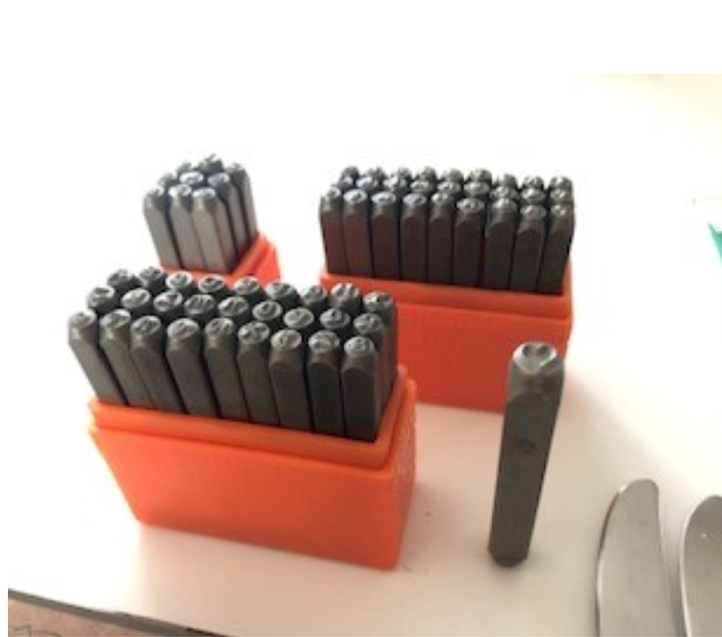
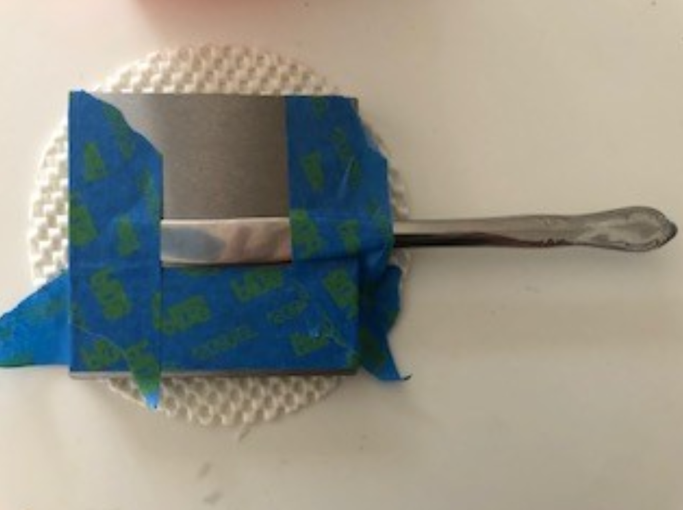
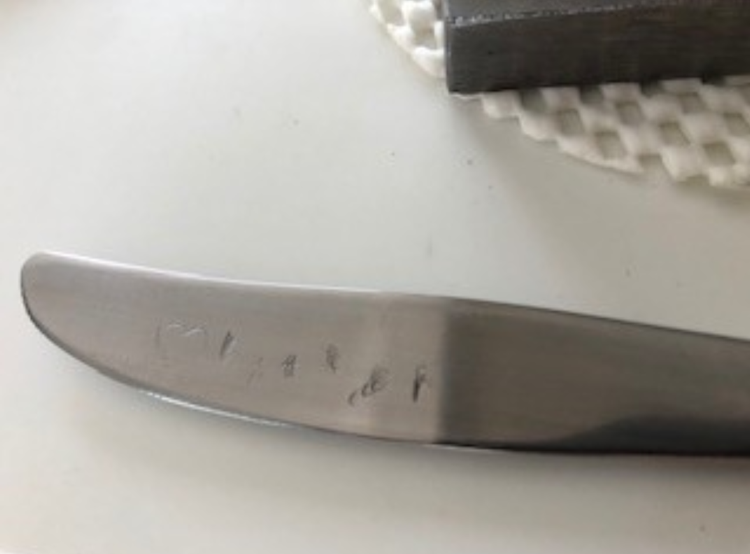
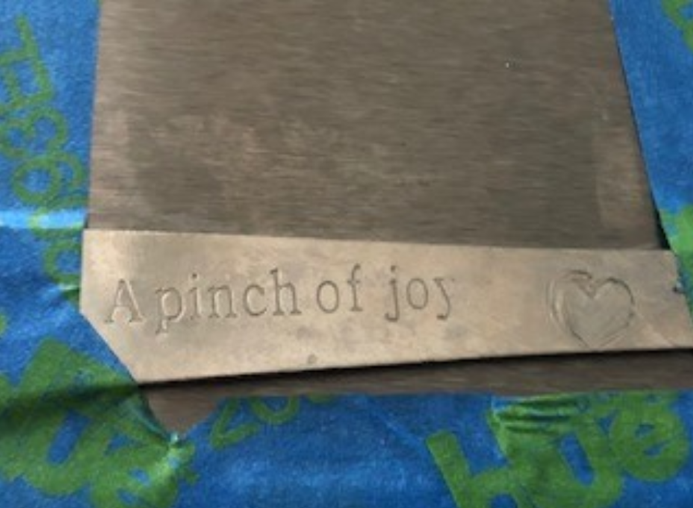
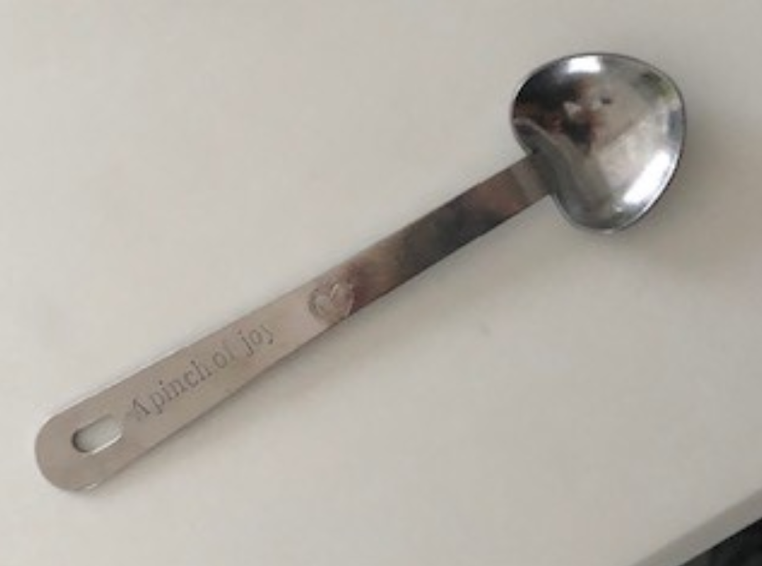
Now is not the time to worry about perfection. The situation we’re living in is exceedingly imperfect. But I have found that when the focus shifts away from a predetermined result and onto the excitement of kitchen chemistry and an improvised process, within all the haphazard messiness lies a wealth of creativity. - Chad Brown, Center for Creativity Assistant. Find Chad's work on Instagram. Amidst hypnotic scrolling on Etsy (inevitable for most artists), I discover and immediately admire the poetic possibilities of taking boring cutlery and turning it into fun ways to proverbially play with your food (utensils). There I am, swiping through spoons upon forks upon knives with expressions slightly reminiscent of Alice in Wonderlandwhen she finds the bottle commanding “Eat Me/Drink Me,” or of Marie Antoinette’s eloquent boast “Let them eat cake” stamped on a pie server. What fun to take something otherwise practical yet boring and turn it into something whimsical by simply impressing silverware with bits of vernacular…I am quickly quite smitten with the idea of trying this for myself. It wasn’t until winter break that some key tools for this trade came to me on the receiving end of my family’s Secret Santa. Now that I find myself starry-eyed in my dining room-turned-art studio, basking in the realm of possibilities, I realize I am about to embark on an adventure: I have never worked with metal before. Fancy folks make jewelry, and sure, I’ve heard stooooories about working with metal, but I have never tried it. These weird times we are in, while keeping us enclosed, also call for us to crawl out of our shell and try new things. So, I figure, now is the time. Let’s do this. Perhaps this fire within to spring clean and create is all part of being cooped up in my domicile. I’m truly missing my local thrift store being open for treasure hunting, so it’s time to treasure hunt at home. I am embarrassed to say it took a world pandemic for me to clean out my silverware drawer, but lo and behold…I have more than enough flatware to stamp and smash for the sake of art: 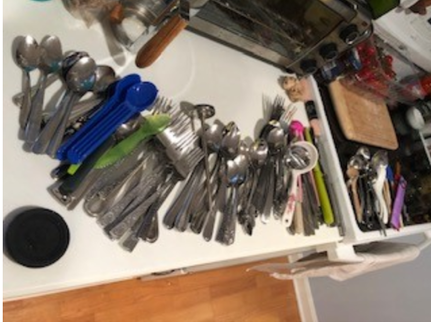 Disclaimer: I have never done anything with the medium of metal. Usually I sketch with charcoal and chalk or scrapbook special things for my penpals around the globe when I am not cooking something in my kitchen or growing something in my garden. What follows with metal could be a total disaster or downright amazing. We shall see! So here are the tools: After my first hammer and smash with a butter knife on my bench block, I decide there simply must be an easier way to do this whole process: the butter knife is lopsided and sliding all over my bench block, making for a potentially dangerous scenario of knuckle whacking. I’m not deterred as I should be, likely due to sheer excitement, and a knuckle whack does occur. (I have no photo of this: it is an embarrassing moment even though I am all alone. It’s at this point that I decide to watch a quick how-to video. Thank you, Beaducation, for this lovely quick how-to video. Okay, masking tape. Brilliant! My new set up includes masking down the butter knife on my bench block. This is much more stable, and produces significantly better results: Reflecting on my usage of flatware, this is an excellent experiment, and I am happy with the results because they are not perfect, and that makes them special. My disappointment is in the ferocity of my whacking. It clearly isn’t determined enough to produce a deeper stamping and therefore represent my butter love. I conclude that I would like to further experiment with softer and/or thinner metals in the future for stamping. So as to leave my mini-art studio feeling encouraged, I pull out a cute set of measuring spoons that have been successfully stamped by someone (or a machine) that has clearly done this before, and decide to add a signature heart stamp modification to it for fun. The end result: A fun trick I like a lot that I pick up in this process is to color in the stamped letters and symbols with a permanent marker and rub the excess off with a magic eraser or steel wool pad to create a darkness in the lettering that makes visibility much more prominent.
Something that I found to be similar in this artform to all “art” is the beauty of process. We try a thing, and modify another, and potentially change it all up, and have another go at it. Finding out what works and what doesn’t is different for everyone, and that is the art of it all: the process of discovery. And the exciting part: there is so much to discover! Let’s all keep discovering. - Casey Klos, Year of Creativity Program Manager. Find her work on Instagram. I think back on my naive past self from just a few months ago, who bemoaned having no time to commit to the half-dozen projects strewn about his workshop; after accounting for the daily commute, work day, meal prep, and compulsory socializing, there seemed hardly a daily half-hour to spend working on anything creative. I wish he knew what I know now: that working from home is perhaps even harder. Despite regaining the time previously spent commuting and having a flexible schedule, there’s something creating a mental block to productivity: clutter. Every project is out on the work surface, begging for attention and exacerbating an ongoing case of option paralysis. A simple technique exists to combat clutter: knolling. Craftspeople and creatives have used this method for decades, probably long before it obtained its popular moniker and was coopted by lifehackers worldwide (including this writer). The artist Tom Sachs, who named the technique and popularized its usage in his studio manual Ten Bullets, was introduced the idea by Andrew Kromelow, a custodian at Frank Gehry’s furniture studio, where Sachs worked at the time. During his shift, Kromelow would arrange his tools in a sharply-geometric layout reminiscent of the angular modernist furniture that was being fabricated for the Knoll company. Sachs later incorporated the idea in his own studio, coining the maxim “Always Be Knolling” as guidance for his studio assistants. Sachs’ rules for knolling are as follows:
A cursory internet search yields color-coordinated photos of “knolled” objects with no relation to one another: tastefully-beige steaming-coffee-and-notebook photos from social media, and photos of common machines and vehicles laid out in a geometric exploded view. Artfully arranging objects, whether adhering strictly to Sachs’ outline or not, can be a creative act in itself. I am, however, interested in its use as an act not done in service of a goal or glory, but one done as meditation, to clear a path for other creative acts. The technique is useful from a practical standpoint and, when employed strictly, certainly has the potential to introduce structure into a dismantled work-from-home life. For this reason, it’s exactly the place I needed to start. After a quick gathering-up of unused items left out days ago — scraps of fabric, books, charging cables — I set about straightening the items I knew would be needed soon. The pen and pencil lined up pleasingly with my notebook; the scissors created a void in the grid filled perfectly by a tape measure; an old book of electronics project ideas sat close-at-hand, while a tiny bluetooth speaker and phone occupied the furthest position from my chair. Beyond the pragmatic tools, I placed nearby some personal items to spark joy and inspiration: a birthday card from my grandparents (with the annual two-dollar bill they sent) and a miniature architect’s pocket scale acquired on a tour of the Frank Lloyd Wright Studio in Chicago. 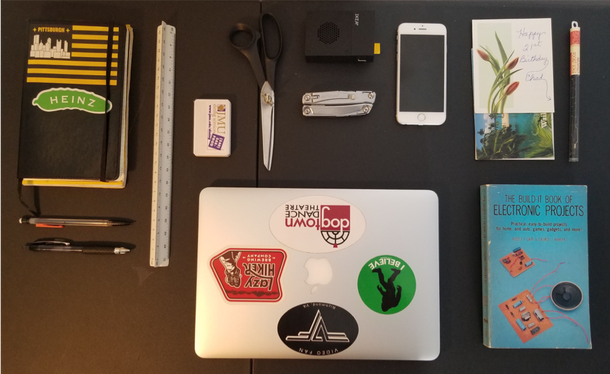 The whole affair took no more than ten minutes, and don’t all these items look sharp, waiting quietly at attention to be deployed? More than this, there seems to be an energy in my workspace now, which before was stifled by the meaningless clutter. I think there truly is something to this process of knolling; one creative act, no matter how trivial, begets another, and another. In this time of stay-at-home orders, I find it crucial to create and maintain a sense of purpose and progress, and a little physical and mental housekeeping goes a long way towards maintaining that momentum.
That pocket scale on my desk is inscribed with a quote: “Architecture is the frame of life.” Whatever your methodology, may you develop a frame for your own practice, and do good work. - Chad Brown, Center for Creativity Assistant. You can find Chad's work on Instagram here. 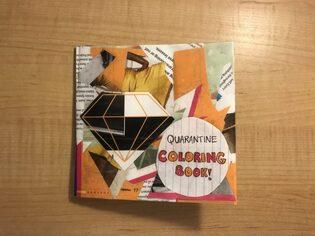 Check out our student ambassador Caroline Kulczycky's tips for creating your own DIY coloring book. Defeat finals panic and get meditative!
Creative Corner | Inside (or outside) the lines of your own DIY coloring book  Hello Pitt Community! I am wondering how all of you are doing? Lots to adjust to and learn in this time of the 2020 pandemic. At first, I thought of all the things I can catch up on. Then it became clear that this will be a bit of a long haul so I carved out a space for work in my home like most of you. This time at home is challenging but I’m going to see if some creative work helps. But of course, I have a staff....  This is why I moved to an upstairs workspace. These two are not ready for Zoom meetings! During our first few staff meetings on Zoom I had to keep my finger on the mute icon to head off any cries for attention. No more! The weeks come in waves:
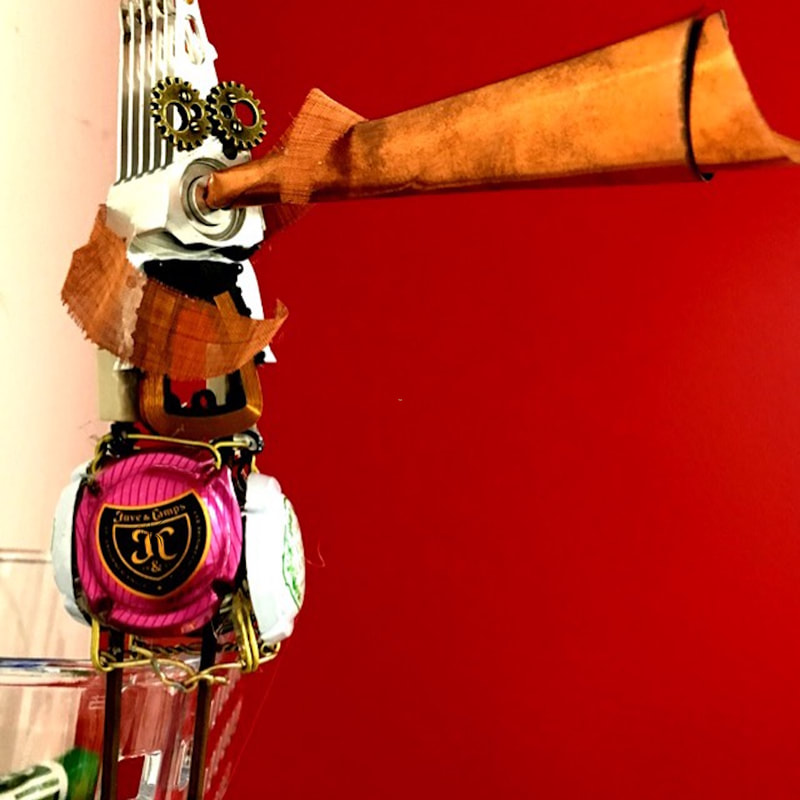
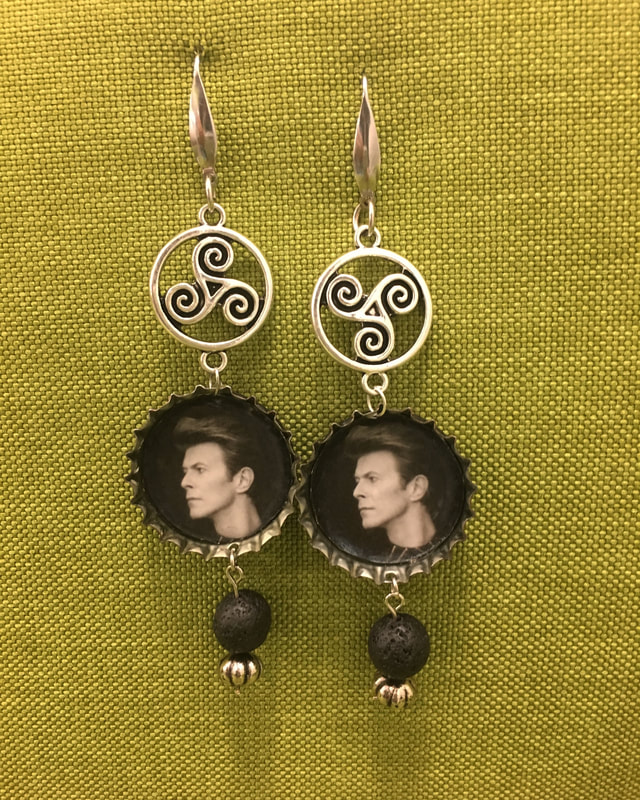
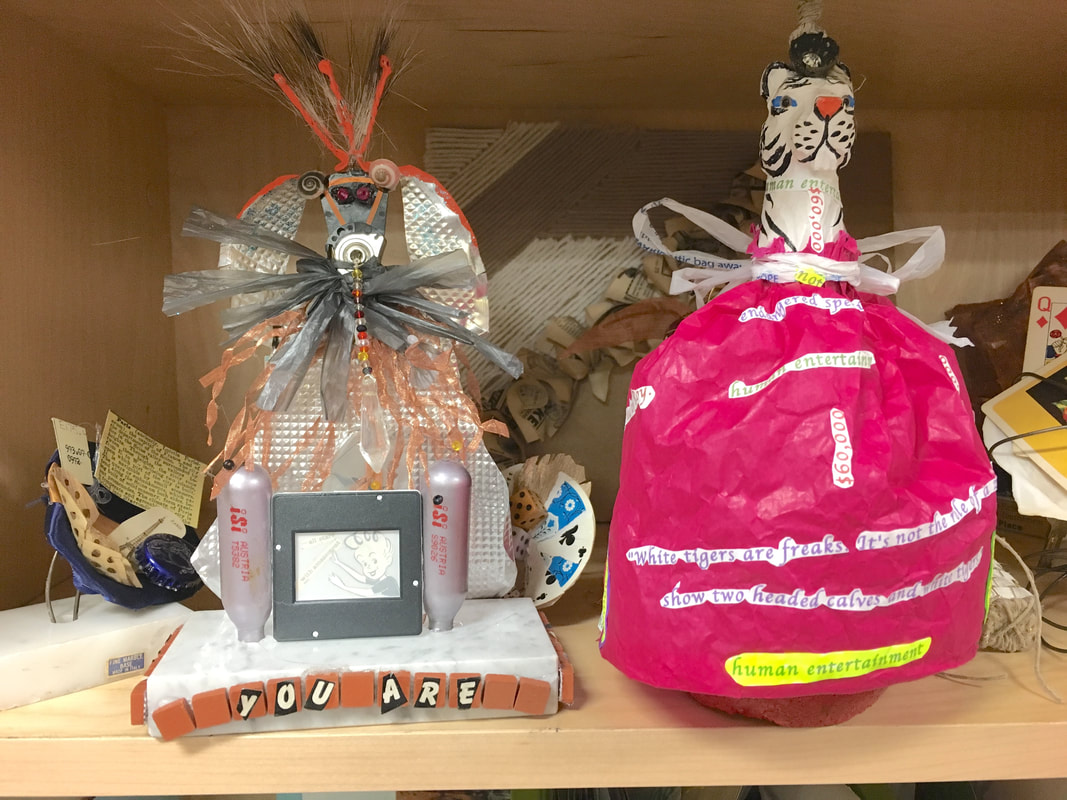
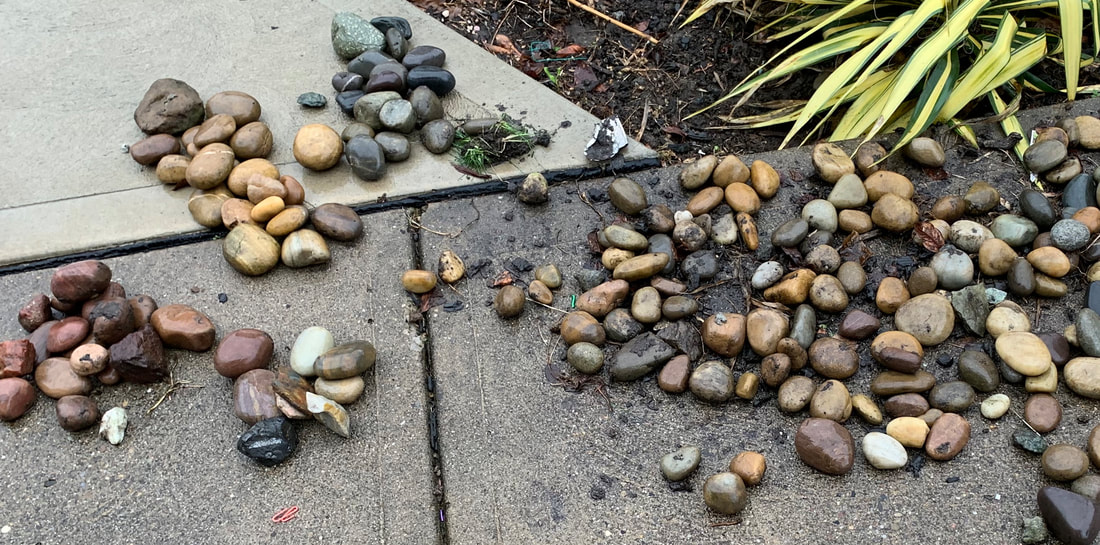
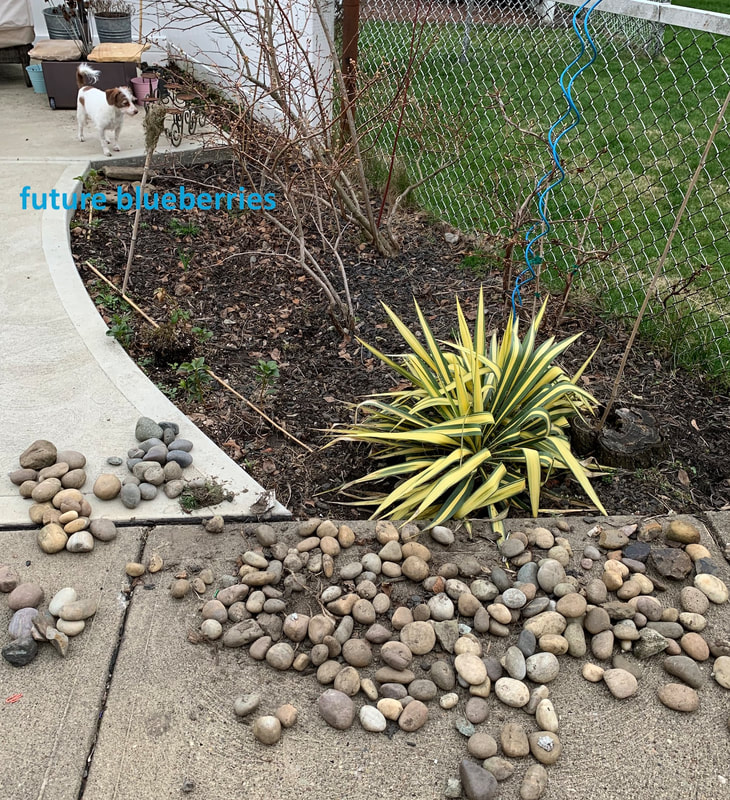
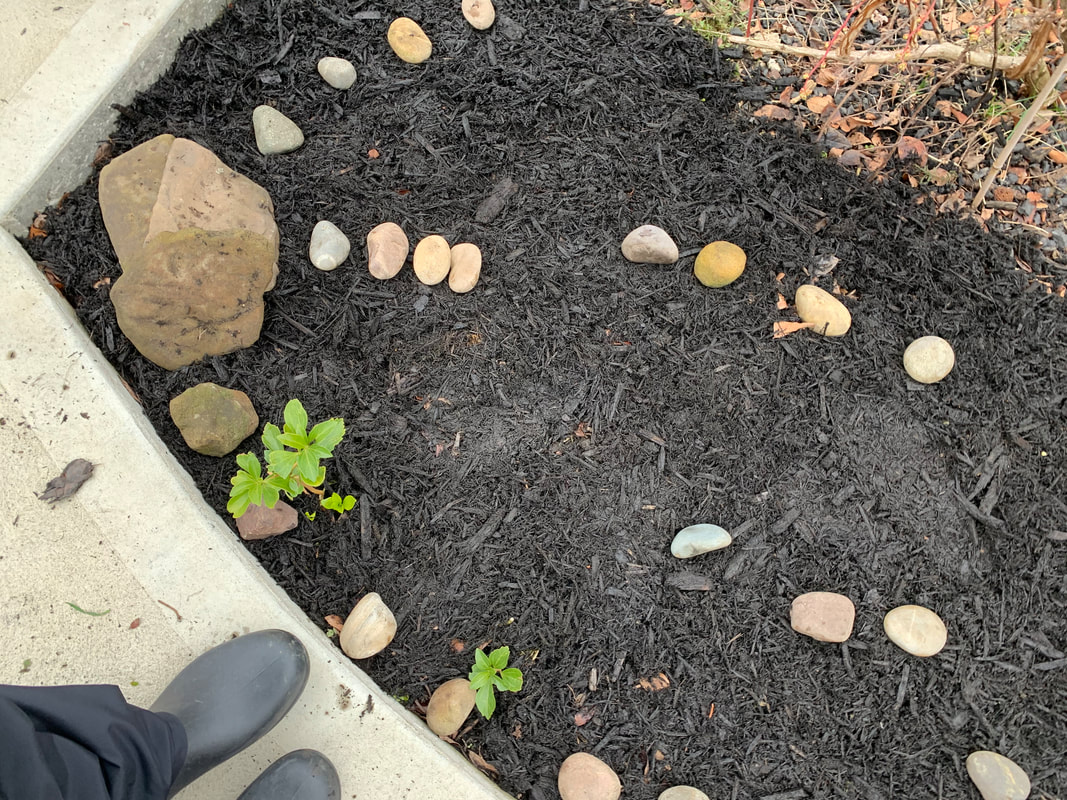
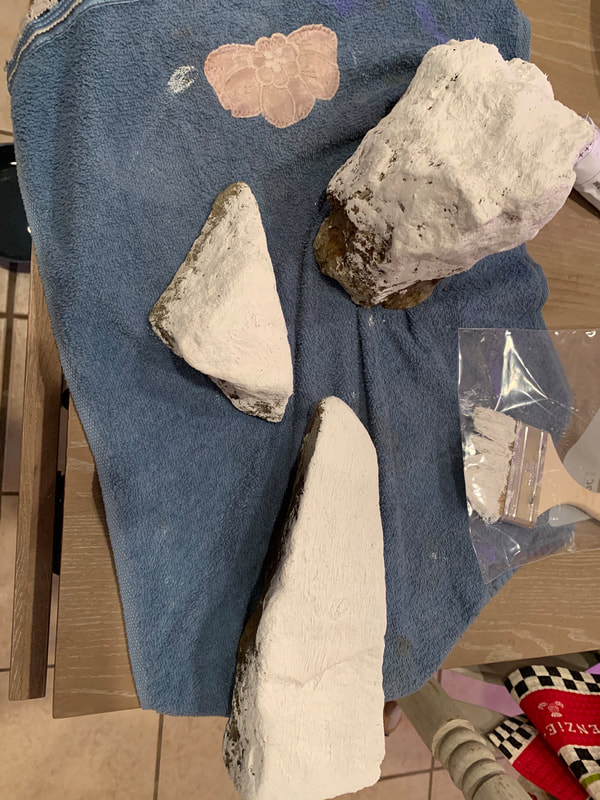
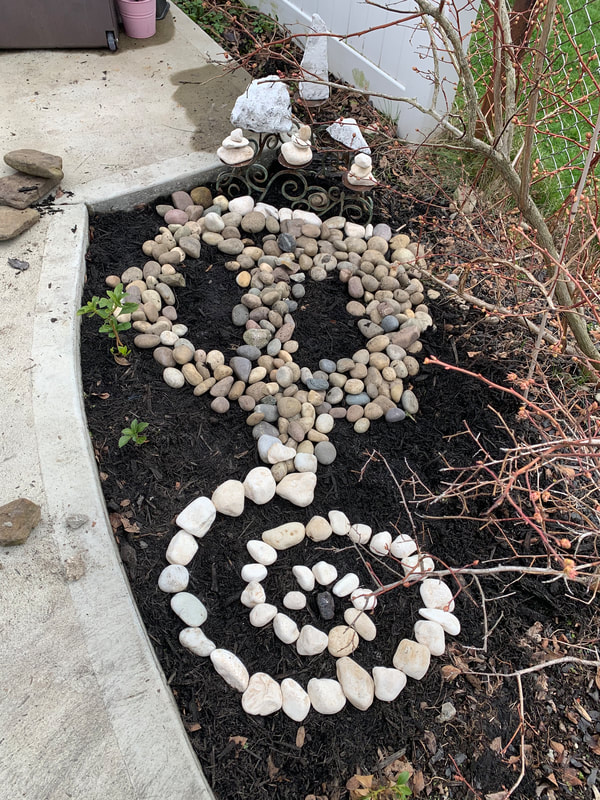
But before the podcast starts up, I am going to create something here at home! If you have been to C4C’s Workshop you’ve seen the Re-Create Wall, which was on my wish list when the Workshop was first being developed. I love seeing people reuse and create. I’ve been creating strange sculptures and jewelry from what someone might say was trash for several years. Here are some things I made from trash at the Workshop! Horn Player is made out of electronic parts, champagne cork tops, and scrap metal. Bowie Earrings are made out of bottle caps, scrap magazine, and some not-trash earring stuff. You Are is made of an old trophy base, coffee can top liner, electronic bits, feathers, empty inserts for whipped cream, and a discarded musical insert. When you pull her necklace, she sings! Snow Lion is made of an old trophy base, broken toy, plastic bag yarn, and reused tissue paper. Now I’m at home without the Workshop’s wall, though, so I have been scrounging around my house for things to recreate. That got a little overwhelming: too much stuff in my house! I had to get outside for some relief. That’s when I found my inspiration: dirt and rocks! I am going to try my hand at Land Art! I’m no Robert Smithson but that’s okay. You can try this, too.
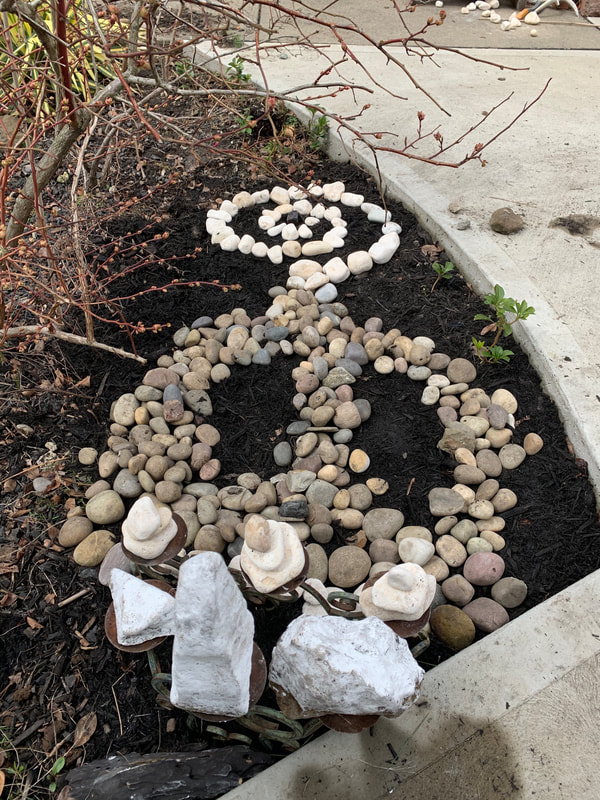
Ta-daaaa!
So, I’m happy with this. I spent time outside. My mind was able to wiggle around in different ways with shape, color, and design. And next week I can make it something new! Hope you’re finding new ways to explore.
- Nancy Kirkwood, Center for Creativity Assistant 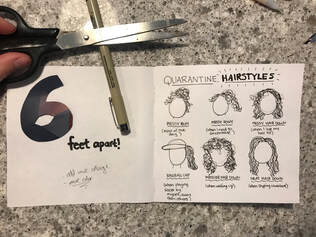 Check out our student ambassador Caroline Kulczycky's tips for making your own zine during these days of physical distancing and social isolation!
Creative Corner | How to make your own quaran-zine |
WelcomeOur blog is a space for C4C staff and guest contributors to share thoughts on creativity, workspaces, processes, and more!
Archives
August 2020
Categories
All
|

 RSS Feed
